Create Email Server on Windows WAMP
An email server on windows WAMP is locally installed and configured mail system that handles sending and receiving emails using SMTP, IMAP and POP3 protocols. Learn how to setup an email server on windows WAMP and integrate it with a webmail interface.
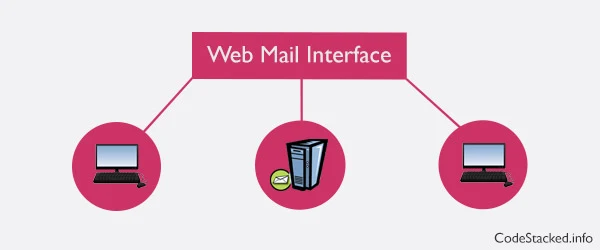
In this post we will install a mail server hMailServer to manage email delivery and add a webmail client RoundCube to access emails through a browser. The hMailServer will serve as windows SMTP server whereas RoundCube will serve as the webmail client for our windows email server. Before we begin we will need to download email server and webmail interface from following links:
hMailServer is an open source free email server for Microsoft Windows with support for IMAP, POP3 and SMTP which handles the mail delivery on local machine. It comes with additional sound features an email server should have.
RoundCube is an open source webmail client written in PHP which uses AJAX on client side. which means it requires JavaScript to be enabled on client browser. It comes with many UI skins, multi language support and a lot more.
First of all we need to enter two host entries in V-Hosts file of WAMP. First one for main domain and second one for webmail interface. The file can be found at the following location on windows. For more detail on how to setup these virtual hosts, give How to Create a Subdomain on WAMP a read.
C:\wamp\bin\apache\Apache2.2.11\conf\extra\
<VirtualHost *:80>
    DocumentRoot "c:/wamp/www"
    ServerName test-domain.com
    ServerAlias www.test-domain.com
</VirtualHost>
<VirtualHost *:80>
    DocumentRoot "c:/wamp/www/roundcube"
    ServerName mail.test-domain.com
    ServerAlias www.mail.test-domain.com
</VirtualHost>
We will have to add an entry to windows
hosts file for above virtual hosts. The windows hosts file can be found
in c:\windows\system32\drivers\etc\ on windows.
Assuming you know how to install WAMP and get it running. I am going to show you the rest two steps hMailServer installation and configuration and Roundcube webmail interface setup. After you have downloaded both follow these steps to install hMailServer.
Install & Configure hMailServer on Windows
- Run the setup of hMailServer you downloaded.
- Click "Next".
- Click checkbox "I accept the agreement" and click "Next".
- Set the destination folder where you want to install hMailServer and click "Next".
- Choose components you intend to install, check both available components and click "Next".
- Click checkbox "User built-in database engine" and click "Next".
- Click "Next".
- Set the password you will need this password to connect to server. Click "Next".
- After all above steps click "Install" to continue installing hMailServer.
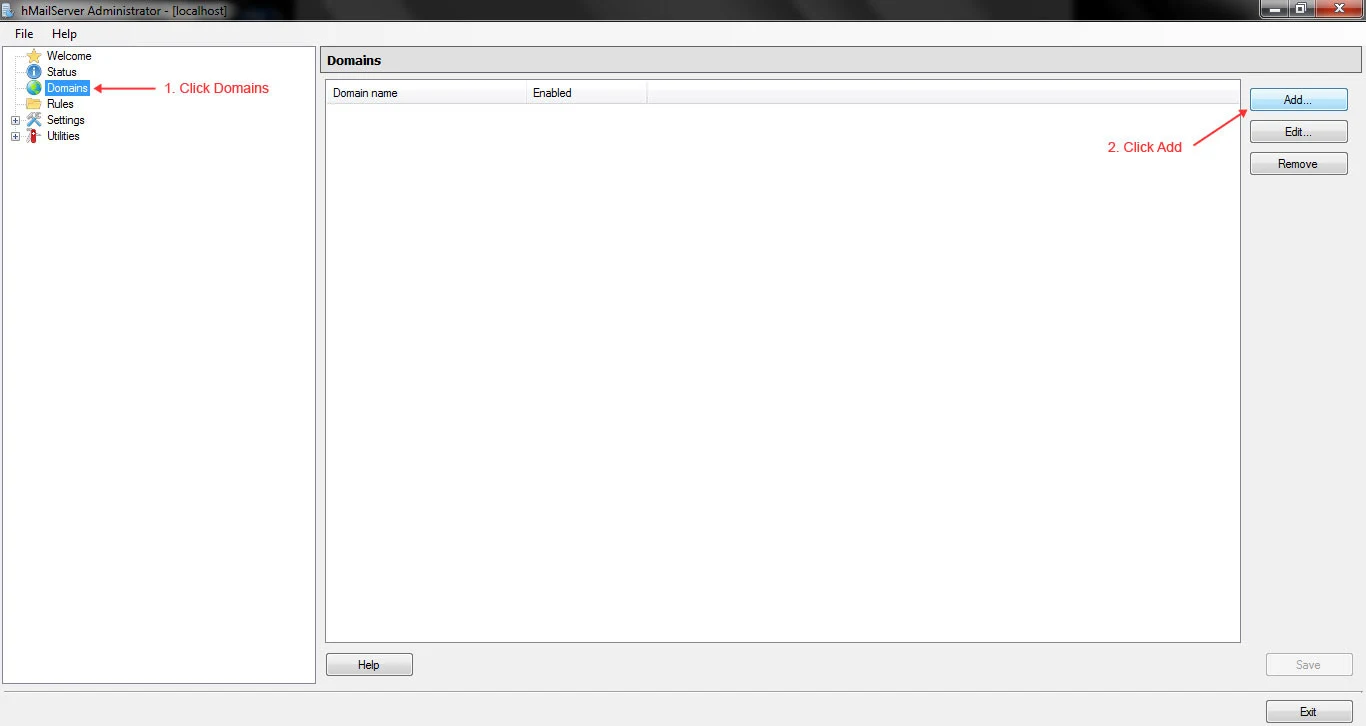
1. On welcome screen click on "Domains" on left side navigation panel and then click on "Add" from top right buttons.
2. Enter a domain name of your choice, I am using
test-domain.com for this post. Click Save.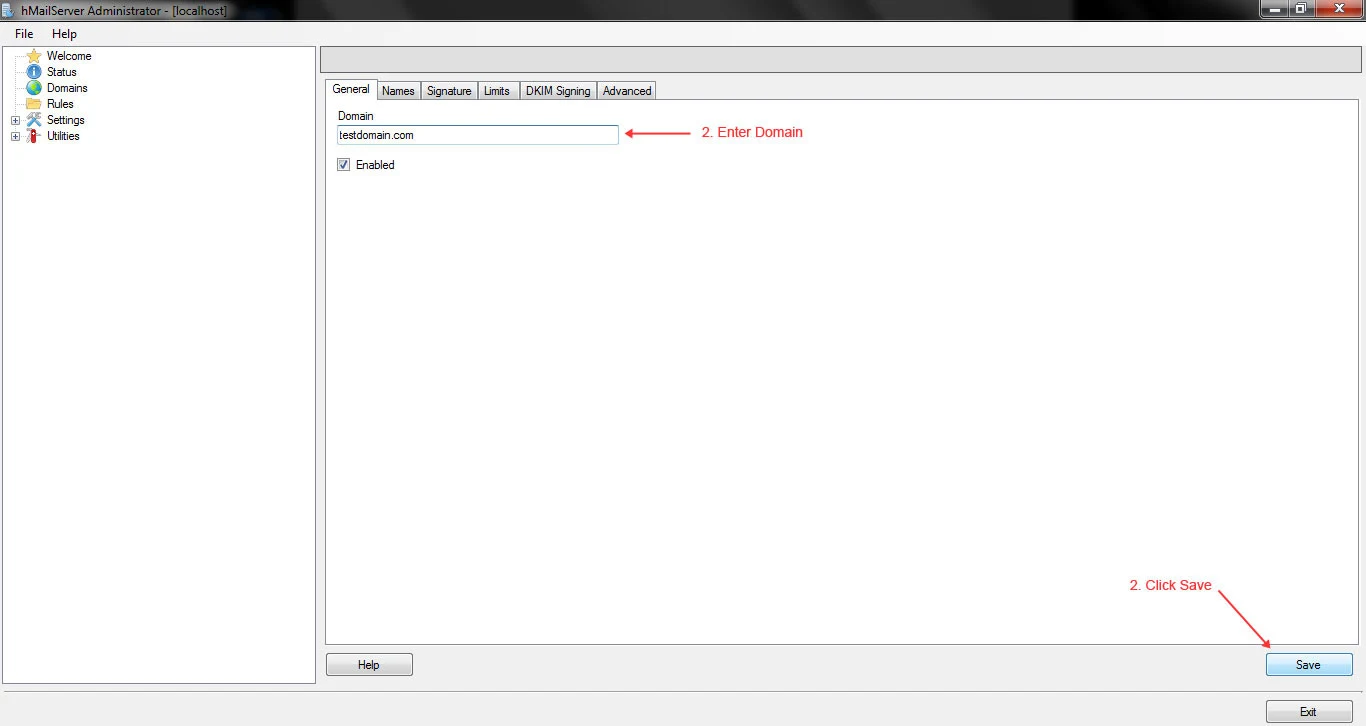
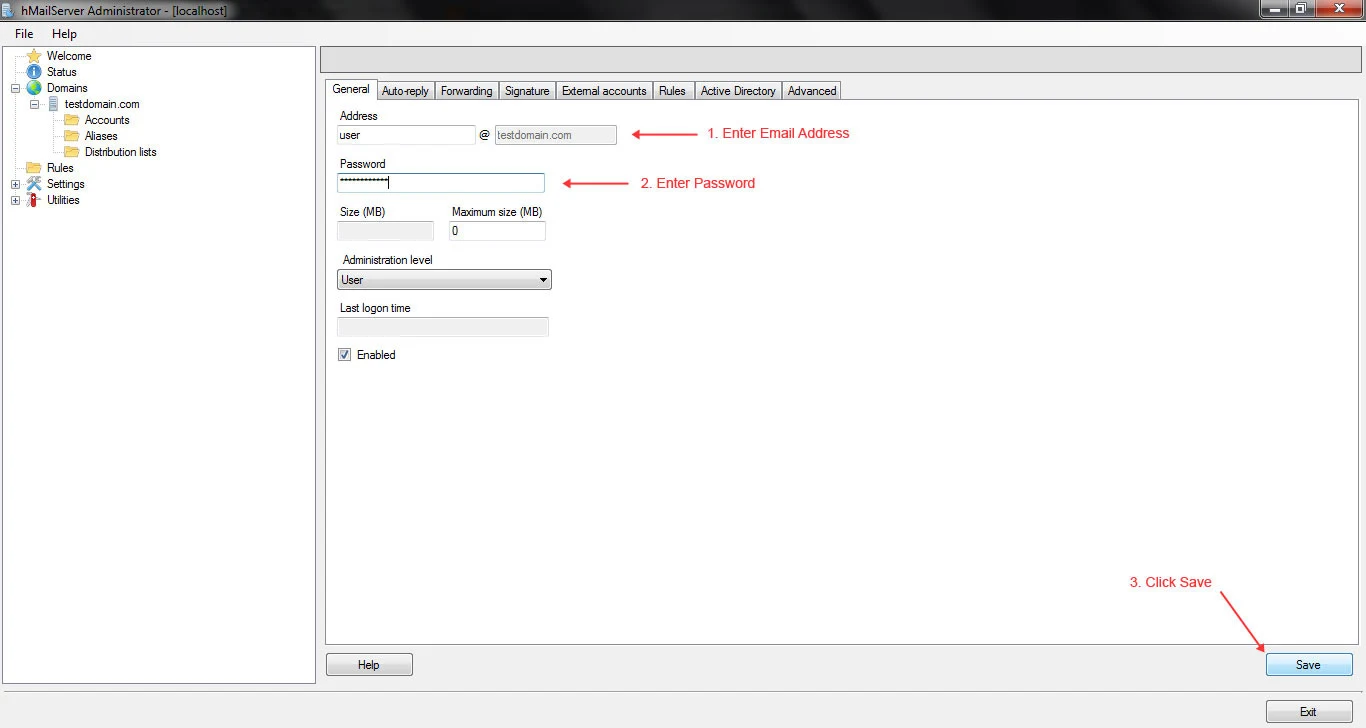
3. Click on Accounts on left side navigation panel and then click on "Add" on top right buttons.
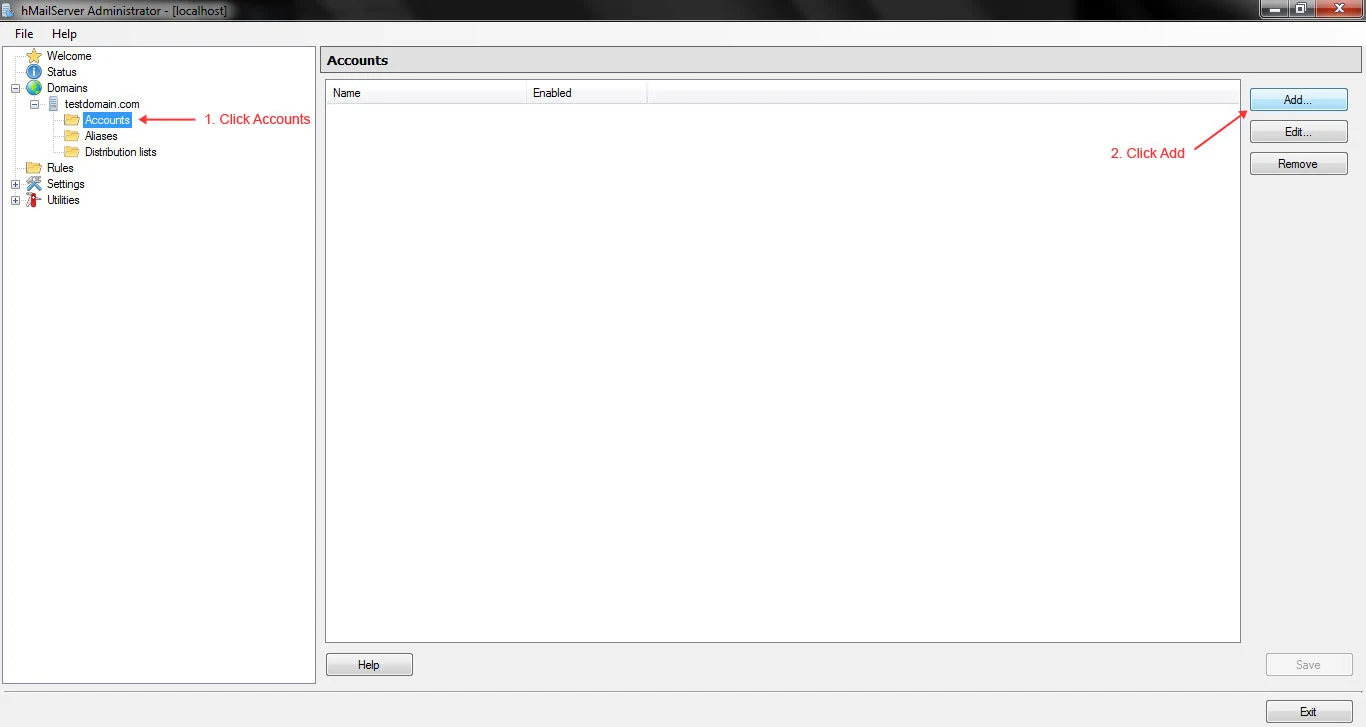
4. Enter email address and password for the account and then click "Save".
Configure RoundCube on Windows
1. Extract the roundcube files you have downloaded towww directory in WAMP and rename it to "roundcube".2. Open a browser and enter
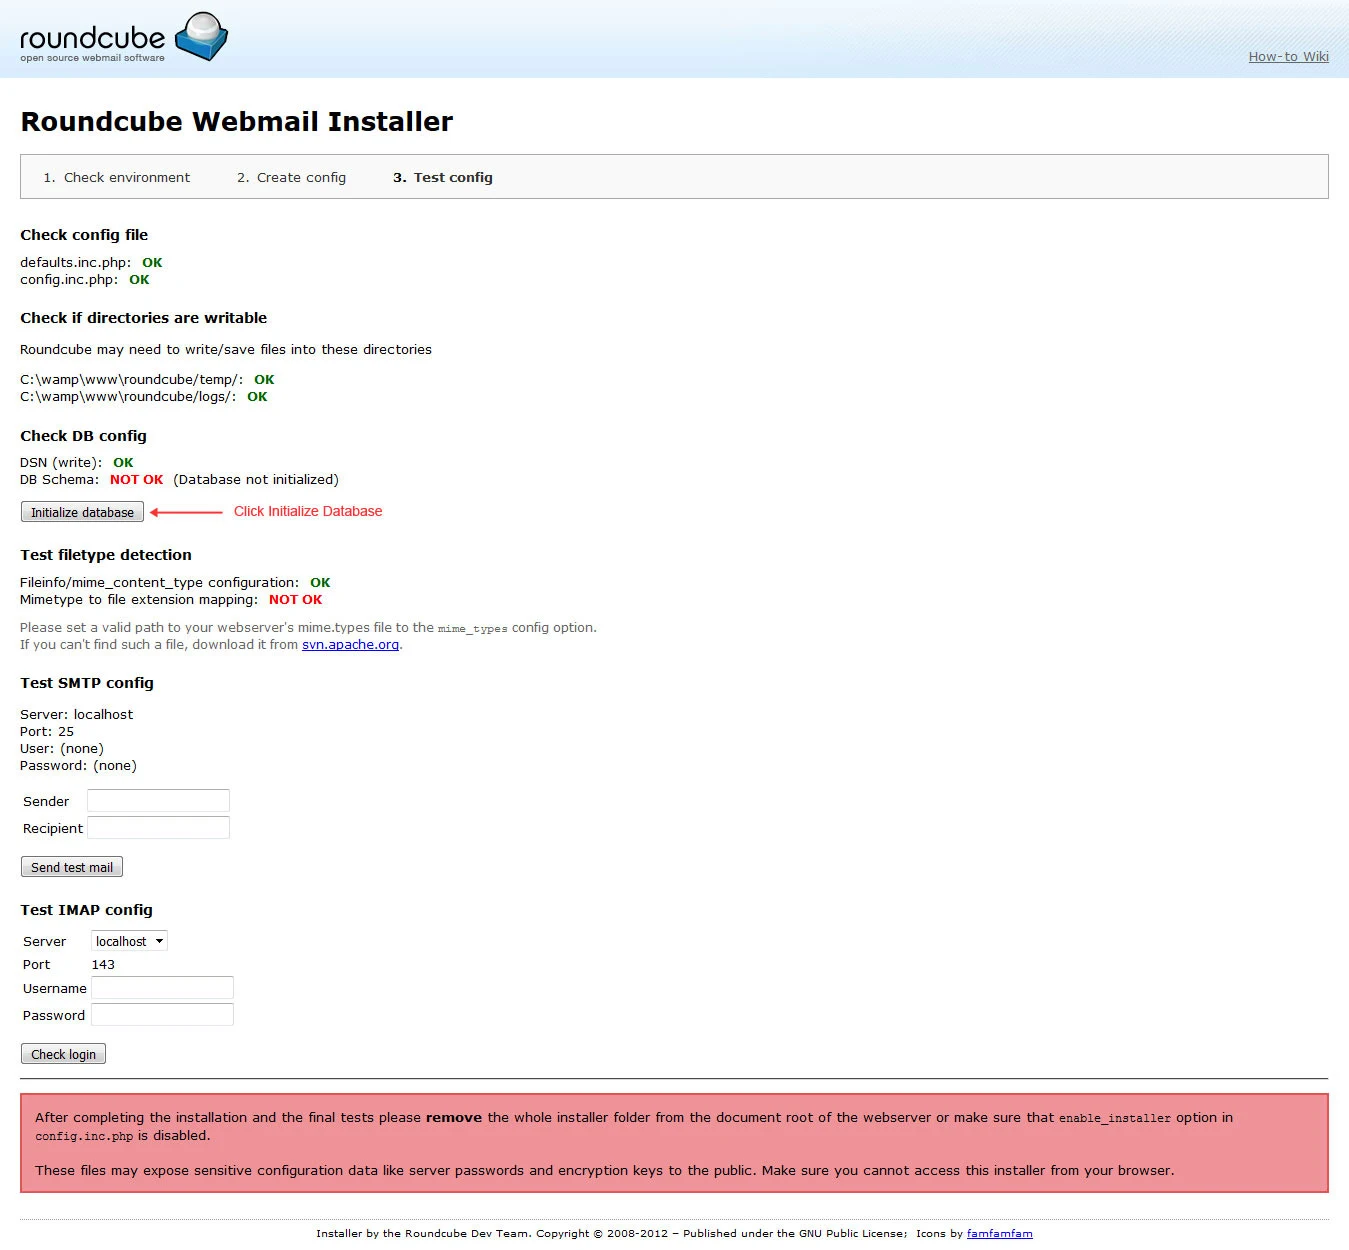
localhost/roundcube/installer URL.3. On the first screen you will see the status of environment normally its all good at this step you just have to click "Next".
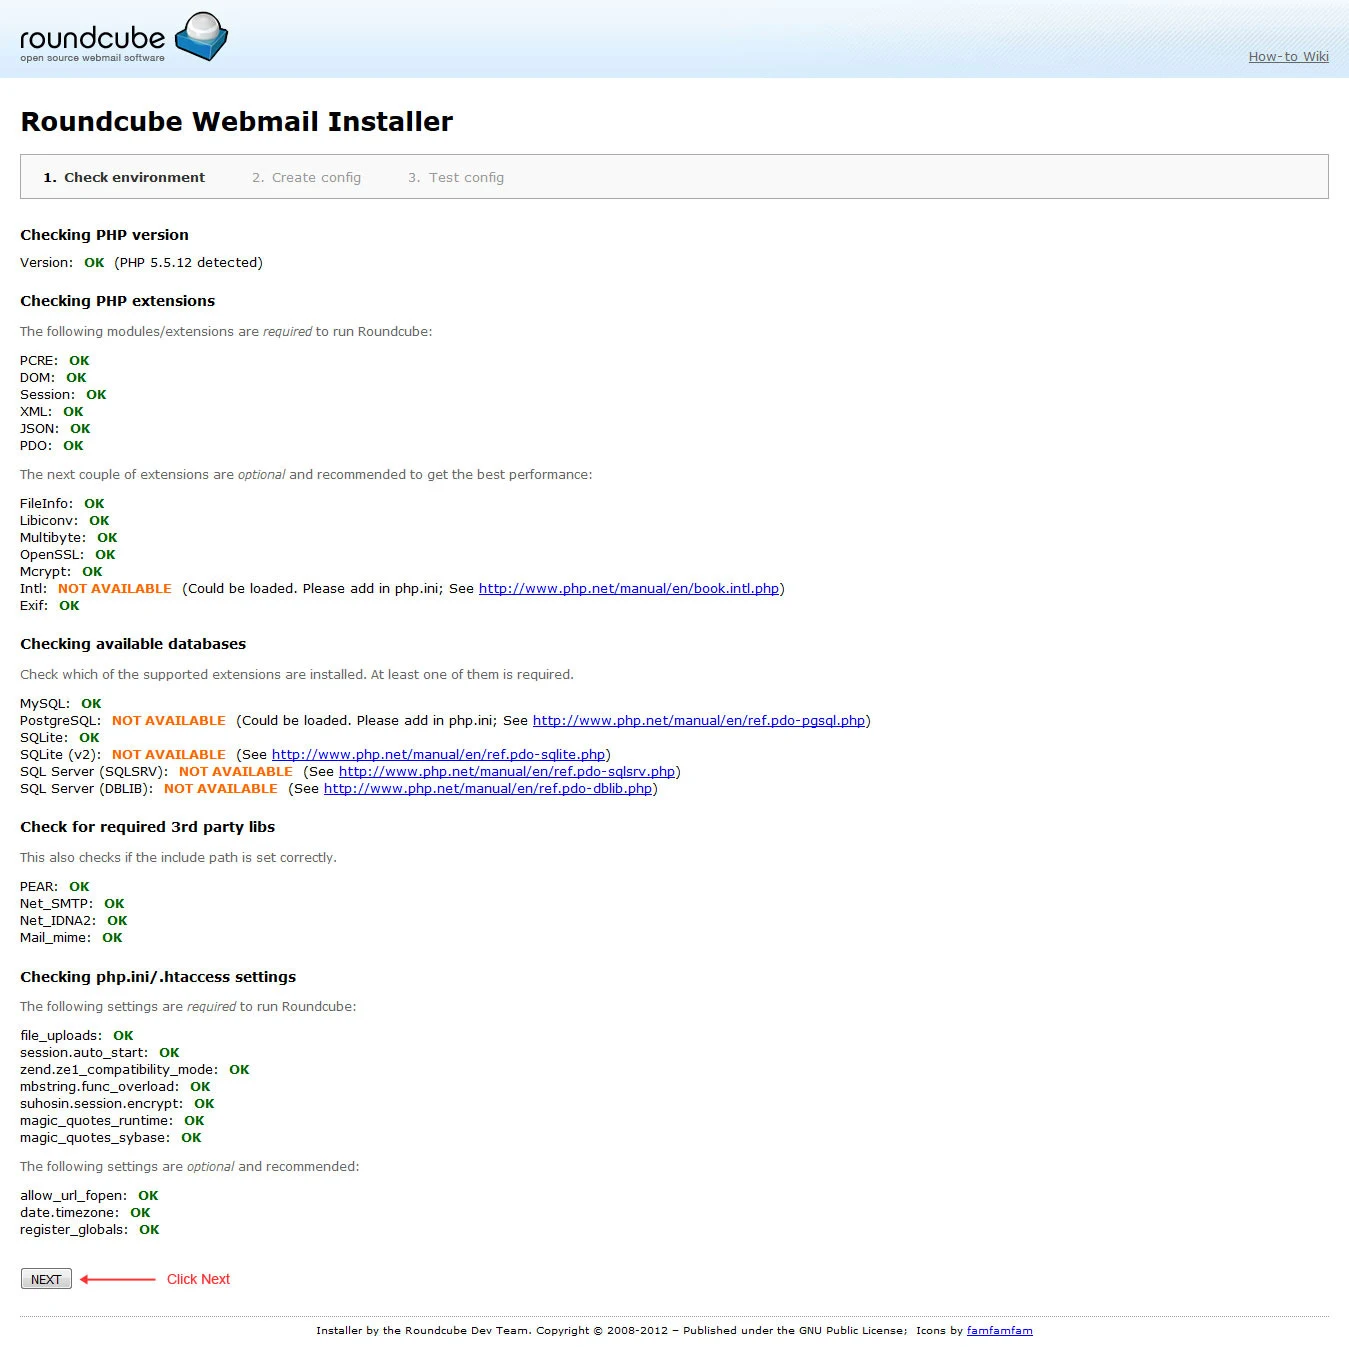
4. On following step page you don't have to change all just enter database host, database name, username for database and password in "Database Setup" section. Also enter the host for SMTP server in "SMTP Settings" section. Click "Create Config".
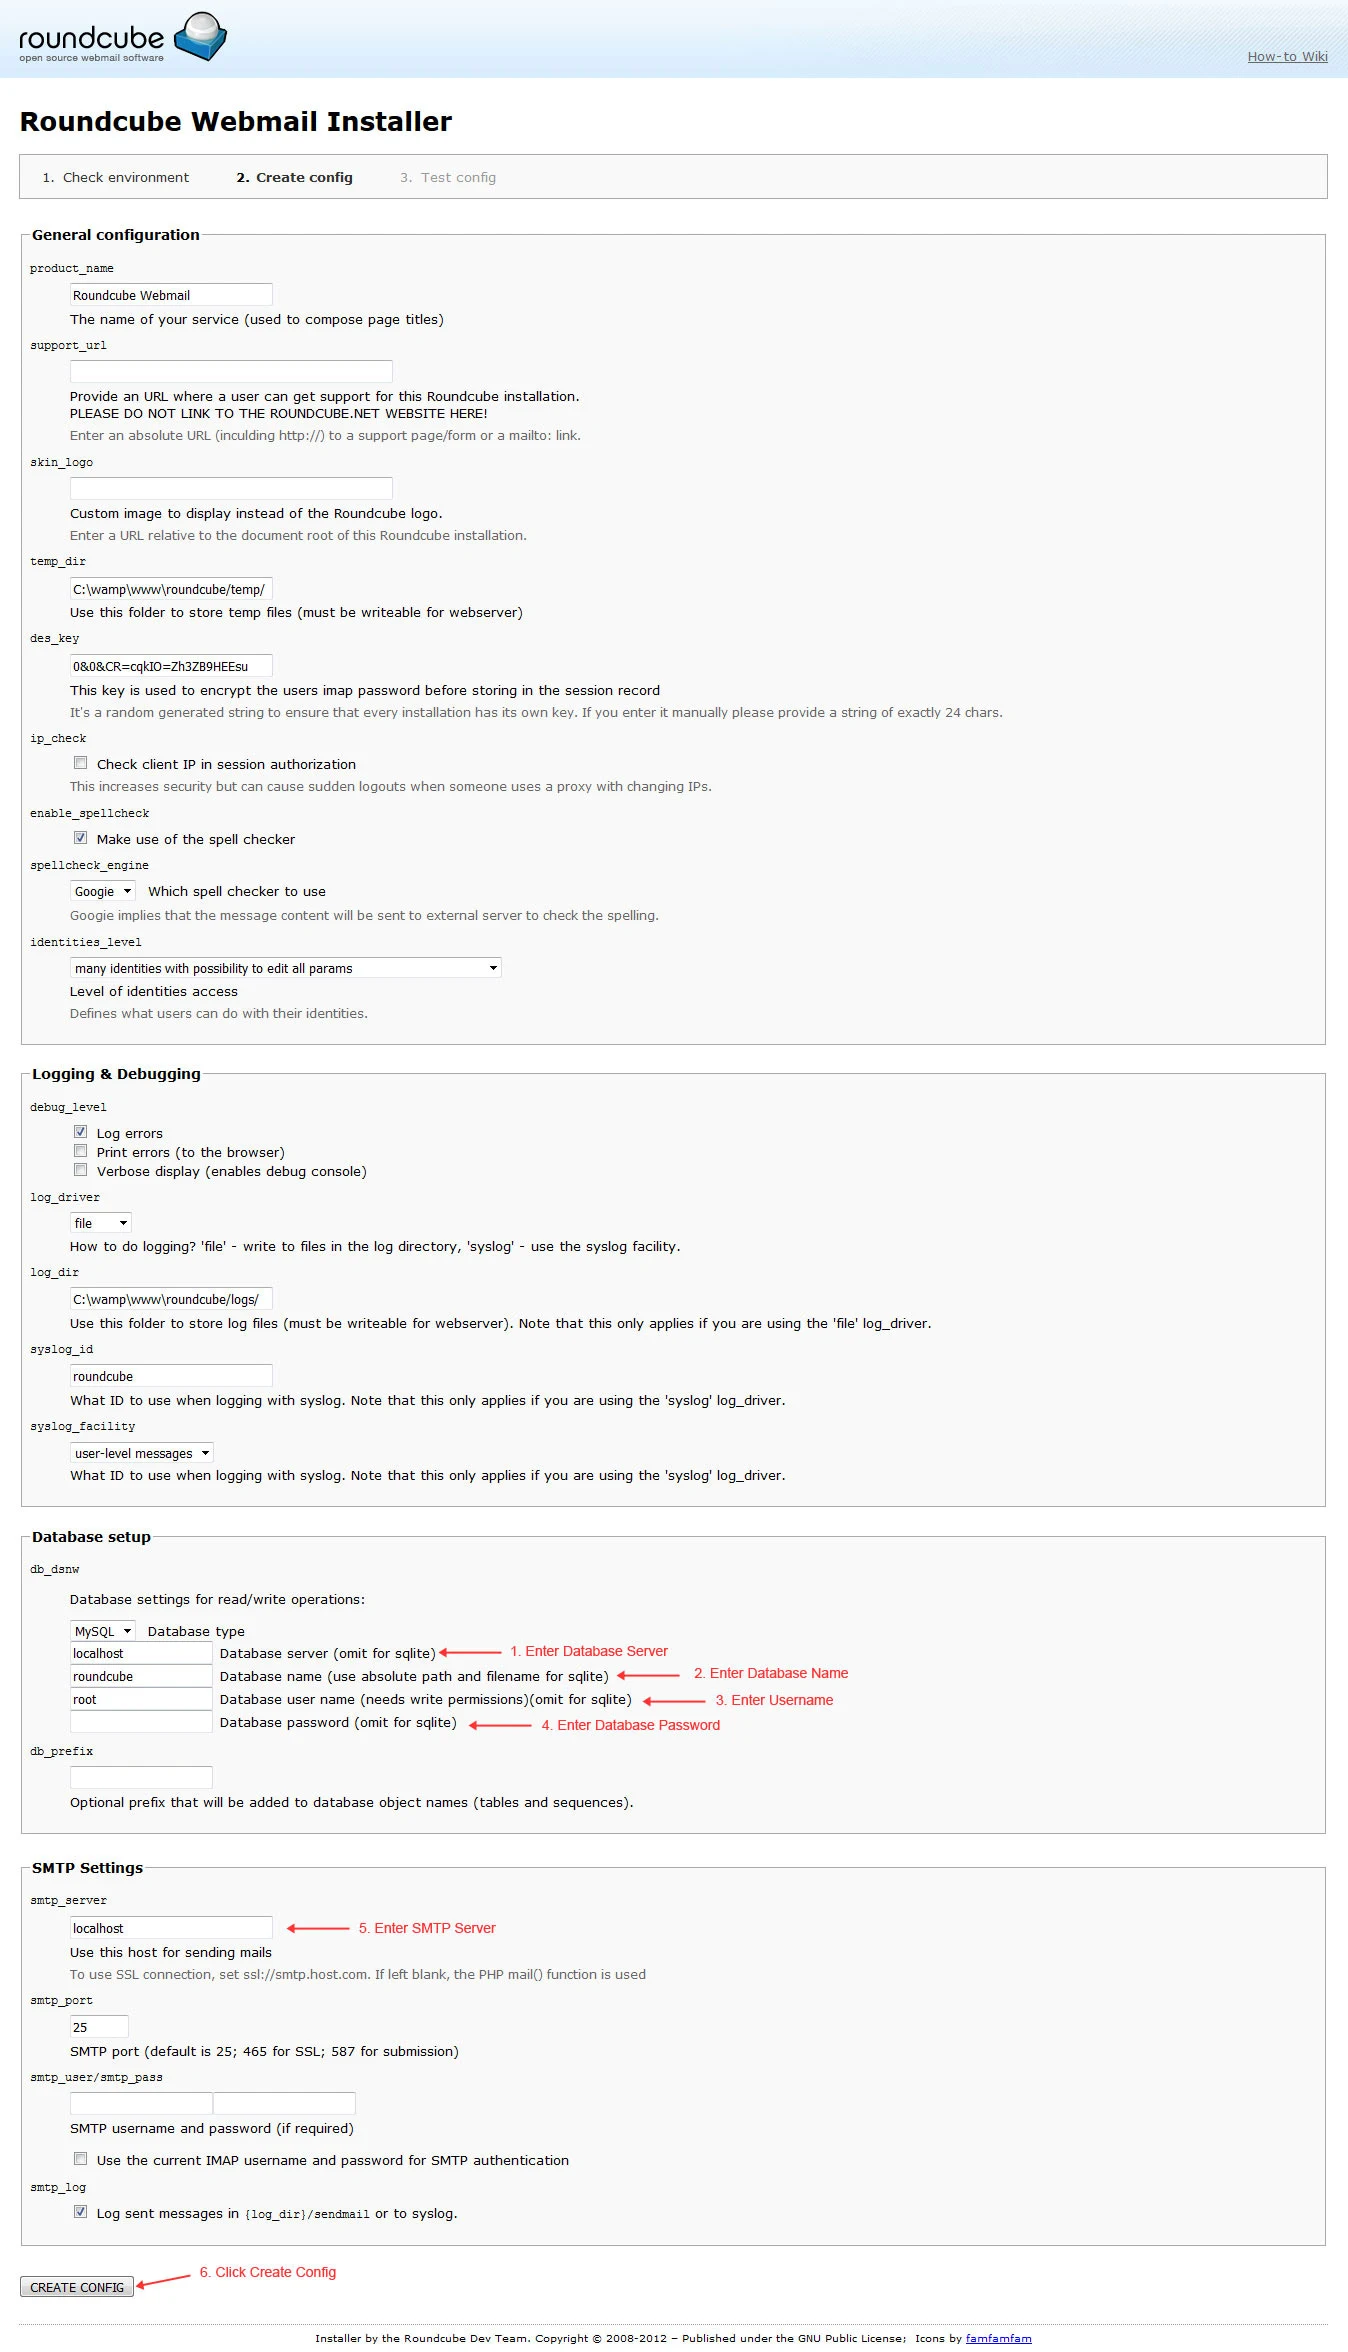
5. This is final step you will see the "Test Config" page. Click the button "Initialize Database" and all done.
Now open "mail.test-domain.com" in any browser and you will see the following page.
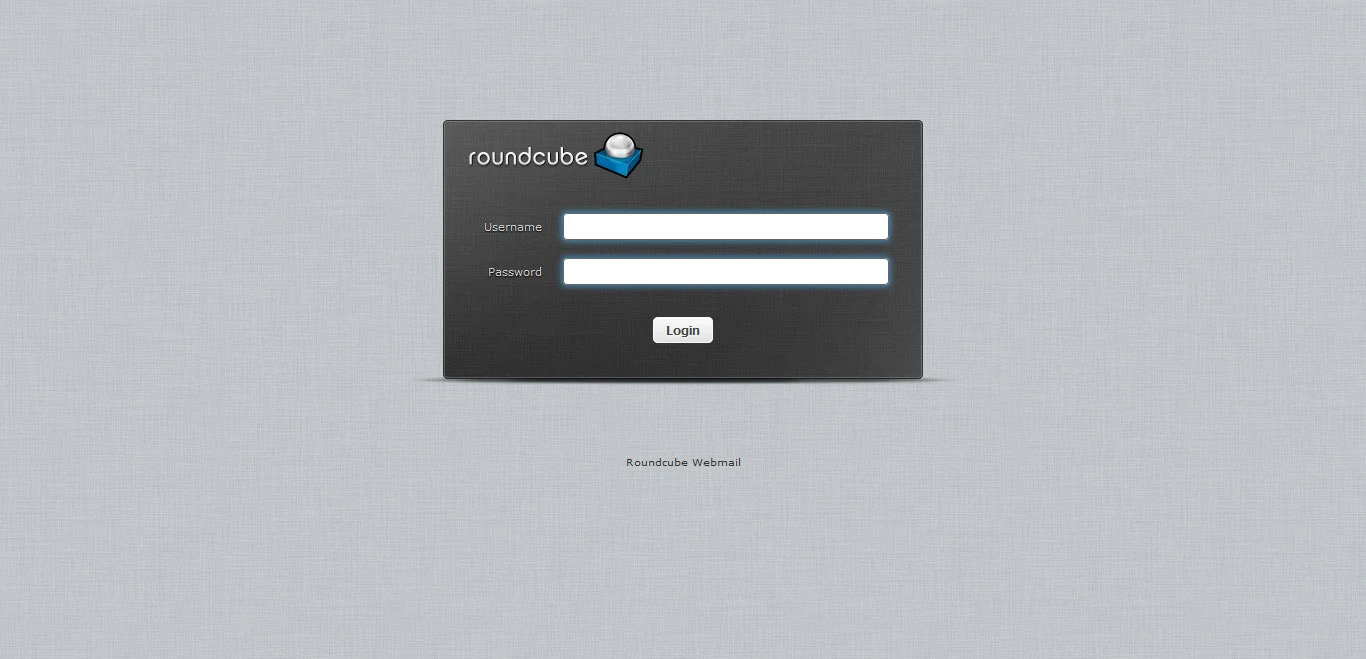
All Done! You just created an email server and webmail interface on local windows machine.
NOTE: If
you are still having issues make sure you followed all the steps
carefully if it still doesn't work you may need to add an exception for
hMailServer in firewall or change the "Require SMPT Authentication in
hMailServer Administrator Panel ➞ Settings ➞ Advanced ➞ IP
Ranges ➞ My Computer".
