
How to Create a Subdomain on WAMP Server
One of the first steps to developing a web application is to set up a development environment on a local machine. This as a first involves setting up virtual hosts for local applications. This post demonstrates a WAMP virtual setup on Windows.
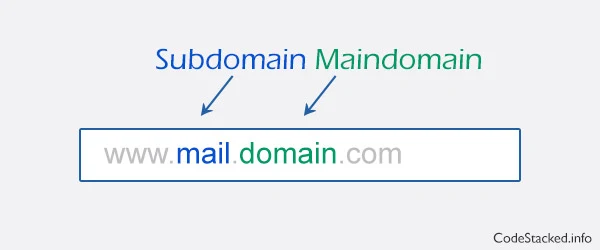
The virtual hosts and virtual host alias modules of WAMP must be enabled to add virtual hosts in WAMP. This whole configuration WAMP Virtual Hosts can be broken down into the following steps:
- Add an entry to the Windows host file to look for a domain on the local machine.
- Enable Virtual Hosts and Virtual Hosts Alias Module in WAMP Apache.
- Add entries to the Virtual Hosts file for our desired domains.
- Test the configuration of subdomain.
What is a Subdomain/Virtual Host?
A subdomain in WAMP is virtual host that points to a unique URL that can be accessed at that specific URL. It is a locally configured virtual host in WAMP to access a project via URL instead of IP addresses. Developers can run multiple projects at the same time by mapping the URL addresses to different directories. To configure a WAMP subdomain, follow the steps below.
Step 1: Add a Virtual Host Entry to Windows Hosts File
The first thing we need to do is we add an entry for our subdomains in the hosts file. On a Windows machine, this file can be found at the following location:
c:\windows\system32\drivers\etc\
This file has no extension, but is just a "hosts" file. So you have to open it using notepad or any editor of your choice. This file also requires administrator permissions to make any changes, so open it using "Run as Administrator". Add the following lines at the end of the file:
127.0.0.1  main-domain.com
127.0.0.1  sub-domain.main-domain.com
We leave the first line as it is where it says "localhost". We add the content of the above snippet to the file after the first line. The first line
from the snippet above is for our main domain and the second line is for our subdomain. You can change the main-domain.com and sub-domain.main-domain.com to any domain of your choice. I am using these as an example for this post. What does this file actually do?
127.0.0.1 is a self-referenced loop back IP. Whenever this IP is accessed, it will reference the local machine to resolve the IP address to a hostname. That means the
operating system will search for the given hostname on the same computer
for the server instead of looking it up in the configured DNS.
Step 2: Enable Apache Virtual Hosts in WAMP
After adding an entry to Windows' hosts file, it is time to enable virtual hosts and the virtual host alias module in httpd.conf
file. The file can be found at the following location:
C:\wamp\bin\apache\Apache2.2.11\conf\
To open httpd.conf, simply click the WAMP Tray icon, move the mouse cursor over Apache, and click httpd.conf in the sub-menu.
After opening httpd.conf, search for the following lines and remove the # from the beginning of these lines, then save and close the file.
#LoadModule vhost_alias_module modules/mod_vhost_alias.so
#Include conf/extra/httpd-vhosts.conf
Now that we are done pointing our domain back to the local machine, open the httpd-vhosts file at the
following location:
C:\wamp\bin\apache\Apache2.2.11\conf\extra\
I have WAMP installed in C:\ directory.
Step 3: Configure Apache VirtualHost for WAMP Subdomain
After opening the file, add virtual host entries with the following lines for our main domain and subdomain, then save and close the file. Before making any changes to the file, always take a backup of the file.
<VirtualHost *:80>
    DocumentRoot "c:/wamp/www"
    ServerName main-domain.com
    ServerAlias www.main-domain.com
</VirtualHost>
<VirtualHost *:80>
    DocumentRoot "c:/wamp/www/sub-domain"
    ServerName sub-domain.main-domain.com
    ServerAlias sub-domain.main-domain.com
</VirtualHost>
The DocumentRoot directory is the directory where all files for our domain are stored. In my case, I have a directory
sub-domain inside the www root directory. The ServerName is the domain name or subdomain name. The ServerAlias is an alternate domain, which is usually www. We did not use any for our subdomain in the second entry above.
Step 4: Restart WAMP Server and Test Local Subdomain Configuration
After properly following the above steps, we are ready to test our configuration. To test our configuration we restart the WAMP server, open a browser, and
enter main-domain.com and then sub-domain.main-domain.com to confirm our configuration. We should see the content of www as the root of main-domain.com and the content of www/sub-domain for our sub-domain.main-domain.com as per our configurations.